Dry Start Method: How to Carpet Without CO2
Updated June 2026
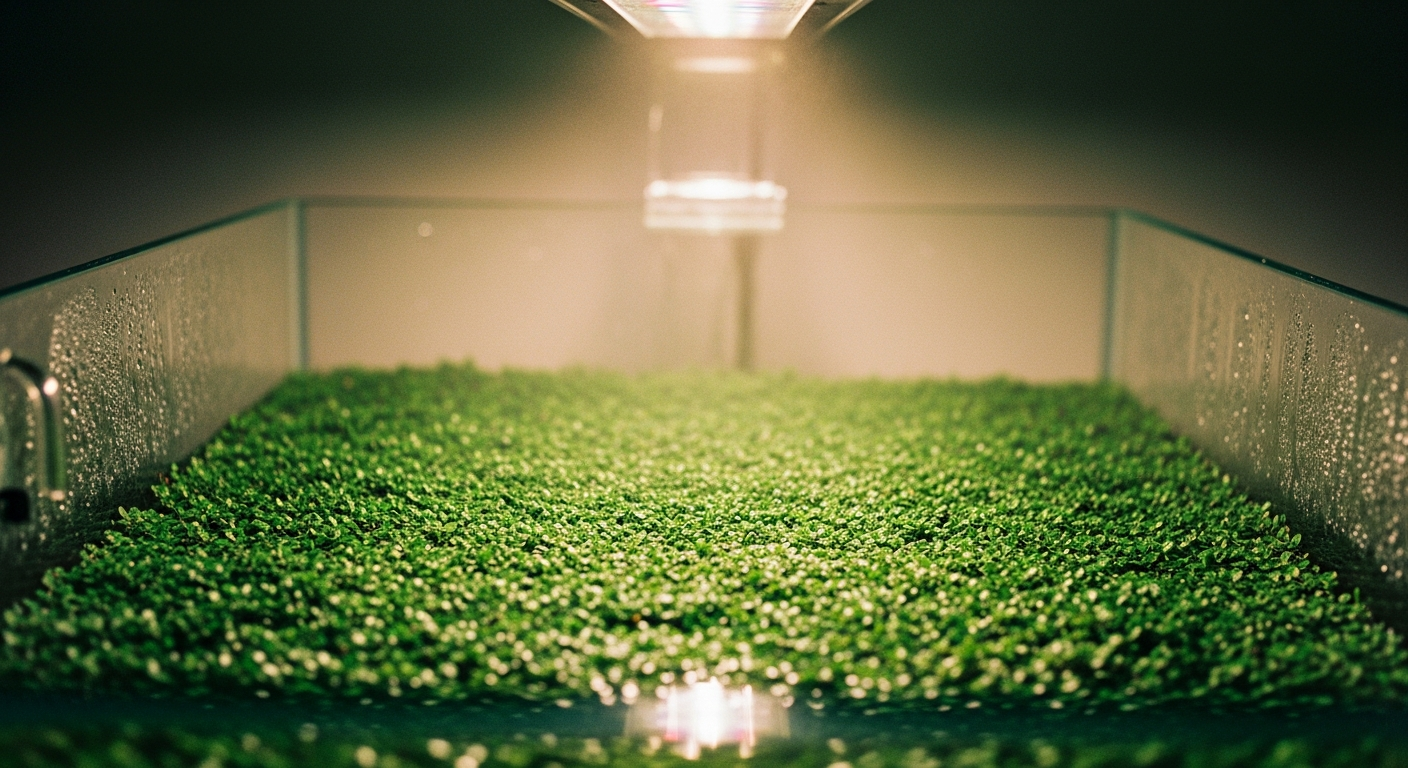
Carpeting a planted tank the traditional way means losing a third of your plants to melt, fighting algae through the unstable cycling phase, and hoping your CO2 levels stay dialed in while the roots are still establishing. The dry start method sidesteps all of that by exploiting a simple biological fact: most carpeting species grow far more aggressively in humid air than submerged in water.
By the time you flood the tank, the carpet is already thick, rooted deep into the substrate, and chemically ready to handle the transition. This guide covers which plants suit the method, exactly how to execute each phase, how to handle mold and humidity problems, and when the flooded aquarium is ready to fill.
Why DSM Outperforms Traditional Carpeting Every Time
The core problem with flooding a planted tank from day one is that carpeting species spend the first two to four weeks in survival mode. The shift from tissue culture or emersed growth to a submerged environment triggers substantial leaf melt, and those dying leaves release nutrients that fuel algae before the carpet is dense enough to compete. CO2 injection helps, but it is not the lever most beginners think it is.
The dry start method removes that bottleneck entirely. Plants grown in humid air avoid the melt phase, develop stronger root systems faster, and produce lateral runners at a rate that submerged growth simply cannot match in the first month. By the time you add water, the carpet has already done the hard work.
The second benefit is algae suppression. Without standing water, there is no light penetrating through a water column to hit bare substrate between plants. The early algae bloom that plagues new planted tanks, particularly green spot algae and cyanobacteria, cannot take hold in a near-dry environment. You flood a tank that is already won rather than one you are still fighting over.
If you are starting from scratch on tank selection, the aquascaping for beginners guide covers how to choose tank dimensions that actually work for carpet layouts before you commit to a scape.
Which Plants Suit Dry Start (and Which Do Not)
Not every carpeting species handles the dry start phase equally. The best candidates are plants with documented emersed growth forms that look and behave differently from their submerged counterparts.
HC Cuba (Hemianthus callitrichoides) is the most popular DSM plant for a reason. It grows even more vigorously emersed than submerged, producing a tight, moss-like texture during the dry phase. Emersed HC Cuba tolerates high humidity without rotting, roots aggressively into fine substrate, and makes the transition to flooded growth with very little melt compared to tissue-culture HC planted directly into a wet tank.
Monte Carlo (Micranthemum tweediei) is the more forgiving option. It grows slightly larger per node than HC Cuba and spreads faster, making it better for larger tanks where coverage speed matters. Monte Carlo tolerates a slightly wider humidity range and is more resistant to mold during the dry phase.
Dwarf hairgrass (Eleocharis parvula or Eleocharis acicularis) works well but behaves differently. It does not create a moss-like surface texture; instead it grows upright blades that mat into a lawn. During DSM it can look sparse until it sends runners, so patience is required. It suits mid-ground carpets and holds up in higher-light tanks post-flood.
Plants that do not suit DSM: glossostigma elatinoides tends to dry out and collapse at the leaf edges despite high humidity, and most stem plants are simply too tall to benefit from the sealed-lid setup. Foreground-only species work best.
Substrate Setup: Getting the Foundation Right
The substrate choice has a bigger impact on DSM success than most guides admit. You need a soil layer with enough organic content to feed emersed roots and a cap layer fine enough for HC Cuba and Monte Carlo to root into.
A nutrient-rich aqua soil like ADA Aqua Soil Amazonia or similar buffering soils work well as the base layer, set at 3 to 4 cm depth at the front and sloping to 6 to 7 cm at the back. These soils lower pH into the mildly acidic range that carpeting plants prefer and release ammonium as they cycle, which emersed plants use directly. For a full breakdown of soil options ranked by plant performance, the best planted substrate guide covers every tier.
Cap the soil with 1 to 2 cm of fine-grained sand or a small-particle substrate like Controsoil or ADA La Plata Sand. This top layer prevents the aqua soil from clouding the water when you flood and gives the carpet fine material to root into at the surface.
Wet the substrate thoroughly before planting. It should be moist to the point of cohesion but not waterlogged. Press it firmly to eliminate large air pockets, which dry out faster than compacted areas and create patchy growth.
Step-by-Step: How to Run the Dry Start Phase
The execution is less complicated than most people expect. The critical variables are humidity, light duration, and patience.
DSM Setup Checklist
- Substrate in place: aqua soil base + fine cap layer, moistened evenly
- Hardscape positioned: rocks and driftwood placed before planting
- Plants in hand: tissue culture or emersed-grown HC Cuba, Monte Carlo, or dwarf hairgrass
- Planting density: 1 to 2 cm spacing between plugs for HC Cuba; 2 to 3 cm for Monte Carlo
- Tank sealed: plastic wrap or a glass/acrylic lid with edges taped shut
- Light running: 8 to 10 hours per day on a timer
- Misting schedule: every 2 to 3 days, or daily if any condensation is absent on the lid
- Temperature: 20 to 26 degrees Celsius; consistent is more important than exact
Plant in small plugs or individual nodes, not clumps. Clumps shade the substrate underneath them and suppress horizontal spread. The goal is even surface coverage from a grid of small starting points, not fast coverage from a few dense masses.
After planting, seal the lid and mist the interior walls and plants lightly. You want visible condensation on the inside of the lid within an hour. If there is no condensation after two hours, the seal is leaking, and you need to add tape or a tighter cover. A humidity reading of 90 to 100 percent inside the tank is the target.
Mist every two to three days by briefly lifting the lid, spraying a fine mist, and resealing. Do not flood the substrate when misting. You are maintaining surface moisture, not watering. Dip a finger 1 cm into the substrate; if it feels dry, mist immediately and more generously. If it is wet enough to clump around your finger, hold off.
Week-by-Week Timeline
| Week | What You Should See | What to Do |
|---|---|---|
| 1 | Plants may look unchanged or slightly pale. Roots are establishing below the surface before visible growth starts. | Mist every 2 to 3 days. Check seal integrity daily. Do not open unnecessarily. |
| 2 to 3 | New growth visible. HC Cuba spreads laterally; Monte Carlo sends runners. Color shifts from yellow-green to bright green. | Spot-check for mold. Remove any white fuzzy patches with tweezers and a dry tissue before they spread. |
| 3 to 4 | Carpet beginning to show visible density. Runners crossing between plugs. Substrate gaps closing. | If any bare patches remain, you can add small plug infills now. Misting frequency can reduce to every 3 days if condensation is strong. |
| 4 to 6 | 80 to 90% substrate coverage. Carpet texture becoming even. Growth rate visibly accelerating. | Begin hardscape and equipment final checks. Order filter media and prepare water conditioner. Flood window approaching. |
| 6 to 8 | Full or near-full coverage. Carpet is thick enough to feel resistance if you press it gently. Root mass visible when a corner is lifted. | Ready to flood. Do not wait beyond 8 weeks as emersed growth can become too thick and compact post-flood transition. |
Mold Prevention During the Dry Phase
Mold is the most common DSM problem and the one that causes the most panic. It looks alarming but is rarely fatal to the plants if caught early.
The white or grey fuzzy growth you will likely see at some point is surface mold growing on decaying plant matter or excess moisture pooling on leaves. It is not the same fungus that kills plants; it is opportunistic decomposer growth taking advantage of the warm, humid environment you have created.
Prevention is mostly about airflow management. Open the lid for 5 to 10 minutes every three to four days during misting to let the elevated CO2 from decomposition escape and refresh the air inside the tank. This brief exposure does not significantly drop humidity and noticeably reduces mold growth rates.
If mold appears on substrate or hardscape (not directly on healthy leaves), leave it. It breaks down naturally and some keepers argue it benefits the biofilm layer that forms on substrate surfaces. Mold sitting directly on plant crowns should be removed with a dry cotton swab or tweezers before it spreads to the growing tip.
High mold in the first week usually means the substrate was too wet at the time of planting. Allow it to drain until the surface is damp but not glossy before adding plants next time.
Flooding: How to Transition Without Destroying the Carpet
Flooding too fast is the main mistake at this stage. A carpet that took six weeks to build can be damaged in thirty minutes by pouring water directly onto it at pressure.
Lower a small plate, bag, or piece of plastic wrap onto the carpet surface to break the water’s impact. Add water slowly, at a trickle, directed onto the plate rather than the plants. Fill to about 5 cm above the substrate over one to two hours, then pause and let the carpet settle for 30 minutes before continuing to the final waterline.
Once flooded, set up your filter, heater, and any CO2 equipment. Run CO2 if you have it; the carpet will respond visibly. Without CO2, the carpet will grow more slowly post-flood but remains viable at medium light levels (around 30 to 50 PAR at substrate level). Good lighting choices for post-flood growth are covered in the best LED planted tank guide.
Expect some melt during the first two weeks after flooding. Emersed leaves die as the plant shifts to producing submerged-form leaves. This is normal and lighter than melt in a traditionally started tank. Trim the dying material with scissors flush to the carpet to prevent it from rotting into the substrate.
Start dosing liquid fertilizers after the first week flooded, once the carpet shows signs of active growth. For guidance on the full planted tank setup from that point forward, the planted aquarium setup guide picks up the workflow from flood day onward.
DSM vs. Traditional Flooded Start: Which Should You Use
| Factor | Dry Start Method | Traditional Flooded Start |
|---|---|---|
| CO2 requirement | Optional. Plants grow well without it during dry phase. | Strongly recommended for carpeting species to prevent melt and algae. |
| Algae risk | Very low. No water column means no early algae bloom. | High in the first 2 to 4 weeks before plants establish. |
| Time to full carpet | 4 to 8 weeks dry plus 2 to 3 weeks post-flood. | 6 to 16 weeks submerged depending on CO2 and light. |
| Plant melt | Minimal post-flood. Plants are already established. | Often significant in the first 2 to 3 weeks. |
| Effort | Requires consistent misting and lid management for weeks. | Requires CO2 management, fertilizer dosing, and algae control from day one. |
| Best for | Beginners without CO2, anyone prioritizing carpet density and low algae. | Experienced keepers with CO2 injection already running. |
The honest trade-off: dry start demands patience during the dry phase but is far more forgiving on the algae and melt side. Traditional flooded starts can move faster if you have CO2 dialed in, but the margin for error in the first month is thin. For anyone setting up a first planted tank, DSM is the lower-risk path.
Frequently Asked Questions
Can you do dry start without a glass lid or plastic wrap?
No. Humidity at 90 to 100 percent is non-negotiable for emersed growth to work. An open tank drops humidity to ambient room levels within minutes, and carpeting plants grown without a sealed cover will desiccate and die, not carpet. Use cling wrap taped at the edges if a lid does not fit your tank.
What do you do if the carpet has patches after 6 weeks?
Add infill plugs to bare areas, mist lightly, and give it two more weeks before flooding. Patchy growth usually means those spots had inconsistent moisture or lower light from hardscape shadows. Flood a 90%-covered carpet rather than a 60%-covered one, as post-flood melt will open gaps the carpet may not recover quickly.
Does dry start work in a tank with driftwood or rocks?
Yes, and hardscape is placed before planting. The one risk is that driftwood in high-humidity environments can grow surface mold aggressively. Boil driftwood thoroughly before the dry start and check the wood surface every three to four days. Surface mold on hardscape is cosmetic and rinses off at flood time.
Marcus Chen
Aquarist & Founder, TanninLab
Marcus has been keeping planted tanks for 14 years. He tests every product recommendation in his own tanks and publishes the raw data.
Last updated: June 2026