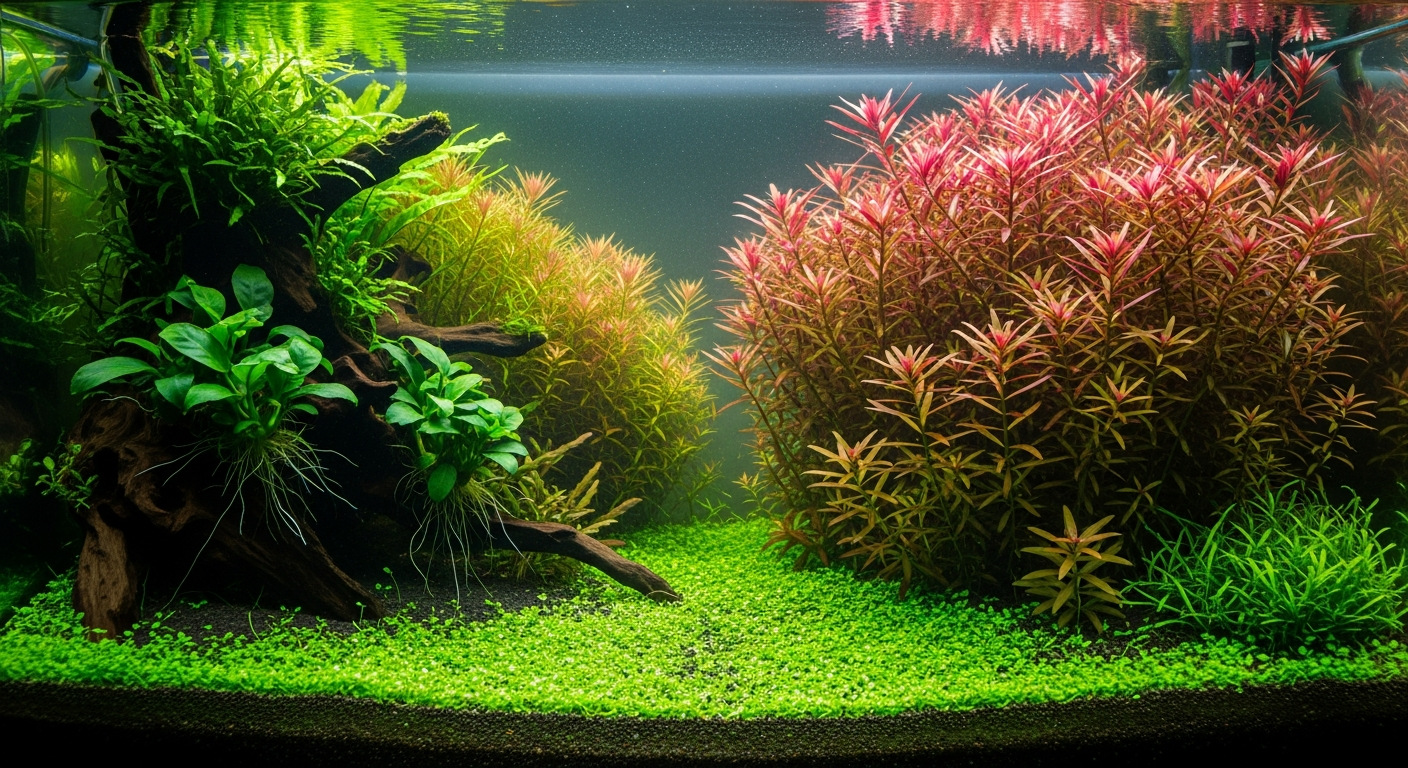
Planted Tank Setup for Beginners: Low-Tech to High-Tech
Updated June 2026
Most beginners overcomplicate this. They buy CO2 systems before they have kept a single plant alive, or they drop $200 on lighting for a tank that could have flourished under a $40 fixture.
The path to a lush planted tank is not about spending more; it is about sequencing the decisions correctly.
This guide covers both paths: the low-tech approach that runs on ambient CO2 and patience, and the high-tech route when you want faster growth and a broader plant palette. Pick the one that matches your schedule and budget, then follow the setup steps in order.
Low-Tech vs. High-Tech: Which Path Is Right for You
The single most important decision in planted tank setup happens before you buy anything. Low-tech and high-tech tanks are not better or worse; they are different systems with different demands.
| Factor | Low-Tech Tank | High-Tech Tank |
|---|---|---|
| CO2 injection | None (ambient only) | Pressurized system required |
| Light intensity | Low to moderate (20-40 PAR) | High (60-100+ PAR) |
| Fertilizer demand | Moderate; root tabs + occasional dosing | Daily or near-daily macro/micro dosing |
| Plant selection | Anubias, java fern, crypts, mosses | Carpet plants, stem plants, demanding species |
| Algae risk | Lower (growth rate balanced with nutrients) | Higher; imbalances show up fast |
| Weekly maintenance | 30-45 minutes | 60-90 minutes |
| Upfront cost | Lower | Higher (CO2 system adds $80-200+) |
If you are new to planted tanks, start low-tech. You will learn how your specific tank responds to light and nutrients before adding the complexity of CO2 management. Most of the best-looking blackwater aquascapes run low-tech by design.
Substrate: The Foundation Your Plants Actually Eat From
Plants feed heavily from their roots. Plain gravel and sand provide mechanical support but almost no nutrition, which means plants slowly starve unless you compensate aggressively with root tabs and liquid ferts from day one.
Active planted substrates, such as Fluval Stratum, ADA Amazonia, or Sera Scaper’s Soil, buffer pH slightly downward and provide months of slow-release nutrients directly to root zones. For a low-tech tank, these are the most impactful single purchase you can make.
A 2-3 inch depth is standard. Shallower beds starve roots; deeper beds can cause anaerobic pockets in fine-grain substrates.
If you prefer a plain sand or gravel look for aesthetic reasons, pair it with the right planted substrate as a bottom layer and cap with decorative material on top. This two-layer approach gives you root nutrition without sacrificing appearance.
Substrate Tip for Tannin Tanks
If you are running a blackwater setup alongside your planted tank, active substrates like Fluval Stratum pair well with soft, slightly acidic water that tannin-releasing botanicals produce. The substrate’s pH-buffering range (roughly 6.5-7.0) aligns with blackwater conditions, so your plants and your botanicals work with the same chemistry rather than against each other.
Lighting: How Much Is Enough (and When More Becomes a Problem)
Light drives photosynthesis, but more light without proportional CO2 and nutrients is the most reliable way to grow algae instead of plants. For a low-tech tank, you want moderate light kept under 8 hours per day on a timer.
PAR (Photosynthetically Active Radiation) is the metric that matters more than lumens or watts. Low-tech plants like anubias and java fern need 15-30 PAR at substrate level. Carpeting plants and demanding stem plants need 50-100+ PAR, and they will not perform without CO2 to use that extra light.
For tanks up to 20 gallons, a quality LED fixture in the $40-80 range handles low-tech plants without issue. For tanks 30 gallons and above, or for a high-tech setup, you need a fixture with measurable PAR output.
The best LED lights for planted tanks cover the full range, with PAR data verified by the aquascaping community rather than manufacturer claims.
Run your light on an 8-hour photoperiod initially. If algae appears, drop to 6 hours before changing anything else. If plants show deficiency signs, extend to 9 hours before adding more fertilizer. Light duration is your first tuning dial.
CO2 Injection: When You Need It and When You Do Not
Plants in a healthy, low-tech tank get enough dissolved CO2 from fish respiration, surface agitation, and bacterial activity. The ambient CO2 in a balanced low-tech setup typically sits around 2-5 mg/L, which is sufficient for slow-growing, low-demand species.
You need CO2 injection when you want to grow carpet plants like Hemianthus callitrichoides (HC Cuba), Glossostigma elatinoides, or demanding stem plants like Rotala rotundifolia at their best. You also need it when you are running high-intensity lighting, because high light without adequate CO2 creates the exact conditions that favor algae over plants.
A pressurized CO2 system with a solenoid, regulator, diffuser, and drop checker is the standard for serious planted tanks. DIY yeast reactors are an option for smaller tanks, but output is inconsistent and difficult to control.
If you are ready to commit to CO2, the best CO2 kits for beginners break down the hardware by tank size and budget without assuming you already know the jargon.
CO2 should turn on 1-2 hours before the lights and off 1 hour before lights go out. Overnight CO2 depletion is normal. The drop checker should show yellow-green during peak injection periods, not yellow (too much) or green-blue (too little).
Fertilizers: What Plants Actually Need and How to Give It to Them
Plant nutrition splits into macronutrients (nitrogen, phosphorus, potassium) and micronutrients (iron, manganese, zinc, and others). Both categories are necessary; deficiencies in either cause distinct symptoms you can diagnose and correct.
For a low-tech tank with an active substrate, your fertilizer routine is simpler than most guides suggest. Root feeders like crypts and echinodorus get their macros from the substrate.
You supplement with root tabs every 2-3 months as the substrate depletes, and a once or twice weekly dose of a comprehensive liquid fertilizer covers micronutrient gaps and serves the water-column feeders like java fern and mosses.
High-tech tanks running daily light cycles and CO2 burn through nutrients faster. Estimative Index (EI) dosing is the standard approach: deliberately overdose macros and micros on a weekly schedule, then do a large water change (50%) on day seven to reset. This keeps nutrients in surplus and removes any buildup, eliminating the guesswork of testing for exact ppm targets.
Understanding the difference between root tabs and liquid fertilizers determines how you split your dosing budget.
Best Starter Plants: Species That Forgive Mistakes
These four genera cover almost every position in a planted tank, tolerate a wide range of conditions, and do not require CO2 injection to look genuinely good.
Anubias grow attached to hardscape, not substrate. Tie or wedge them to driftwood or rock; burying the rhizome causes rot. Growth is slow but nearly indestructible under low to moderate light. Anubias barteri and Anubias nana are the most widely available variants.
Java fern (Microsorum pteropus) shares anubias’s attachment habit and tolerance range. It propagates by growing plantlets on the edges of mature leaves, which you can detach and reattach elsewhere. The “Trident” and “Narrow Leaf” varieties add textural variation without additional care demands.
Cryptocoryne species are the foreground and midground workhorses of low-tech aquascaping. They root in substrate and can go through a brief “crypt melt” after planting (leaves dissolve, then regrow). Do not throw them away during melt; the root system is intact and recovery happens within weeks.
Java moss (Taxiphyllum barbieri) attaches to any surface, tolerates low light and wide pH ranges, and provides cover for fry and microorganisms. It can grow dense enough to trap detritus, so thin it periodically to maintain flow-through.
Planting Day: The Sequence That Prevents Rookie Mistakes
Before adding water, place your hardscape (rocks, driftwood) and draw out zones for foreground, midground, and background plants. Tall stem plants go against the back glass; low-profile species go near the front. Work back to front when planting so you are not reaching over already-placed specimens.
Stem plants like Bacopa caroliniana, Ludwigia repens, and Hygrophila polysperma are planted in small bunches with at least 2 inches between groups. They will bush out over time and fill negative space naturally. Plant too densely from day one and you block light to lower leaves, which triggers die-off and algae on the decomposing material.
Add water slowly using a plate or bag placed on the substrate to diffuse the flow. For the first two to three weeks, run the light at 6 hours while the plants establish root systems. This is when your tank is most vulnerable to algae; the plants are not yet growing fast enough to outcompete nutrient uptake.
Managing Algae in a New Planted Tank
Some algae in the first four to six weeks is expected. New Planted Tank Syndrome is real: the substrate is leaching nutrients faster than immature plants can absorb them, and the bacterial colony in your filter has not yet balanced. Expect green spot algae on glass and maybe a film on the water surface.
The responses that actually work: reduce photoperiod (drop to 6 hours if you see algae spreading), increase plant density so there are more competitors for dissolved nutrients, and introduce algae-grazing fauna.
Nerite snails eat green spot algae off glass and hardscape without harming plants. Amano shrimp are the most effective algae grazers in the hobby for soft filamentous algae. Otocinclus catfish work diatoms off broad leaves.
Do not respond to new-tank algae by increasing light or fertilizer. Both accelerate the problem. Stability and patience in weeks two through six will carry you past the worst of it.
Water Parameters and Weekly Maintenance
For the majority of beginner-friendly species, the target range is pH 6.5-7.5, temperature 72-78°F, and hardness (GH) between 4-12 dGH. Active substrates push pH slightly lower, which suits most plant species and the soft-water fish commonly kept in planted tanks.
Weekly maintenance: a 25-30% water change, a trim of any dead leaves, and a brief wipe of the front glass with a magnetic scraper. For high-tech tanks, also dose macros and micros per schedule.
The water change is not optional. It resets nutrient ratios, removes dissolved organics, and prevents the gradual parameter drift that shows up as unexplained plant decline months later.
Test for ammonia and nitrite during the first six weeks until you confirm the nitrogen cycle is complete. After that, testing nitrate every two to three weeks and adjusting water change frequency based on readings is sufficient for an established tank.
Planted Aquarium Questions Worth Answering Directly
- Can you set up a planted tank without CO2?
- Yes, and most beginners should. A low-tech planted tank using anubias, java fern, crypts, and mosses grows steadily and looks excellent under moderate lighting without CO2 injection. CO2 becomes relevant when you want high-growth carpeting plants or a faster turnover on stem plants.
- How long does a planted tank take to establish?
- The nitrogen cycle completes in three to six weeks for a new tank. Plants typically show visible new growth within two to four weeks after planting. Expect the tank to look intentionally designed rather than just “full of plants” around the two to three month mark, once root systems are established and plants have filled their zones.
- Why are my aquarium plants turning yellow?
- Yellowing in planted tanks most commonly signals nitrogen deficiency (older leaves yellow first), iron deficiency (new growth yellows while veins stay green), or insufficient light reaching lower leaves. Check your fertilizer routine first, then evaluate whether your light is penetrating to the affected areas. A dose of a comprehensive liquid fertilizer often reverses early deficiency within a week.
- How many hours of light does a planted aquarium need?
- Eight to ten hours daily suits most planted tanks. Low-tech setups with undemanding plants can run 6-8 hours successfully, especially if algae is a recurring issue. High-tech tanks with CO2 can push to 8-10 hours. Always use a timer; consistent photoperiods matter more than the exact duration.
Marcus Chen
Aquarist & Founder, TanninLab
Marcus has been keeping planted tanks for 14 years. He tests every product recommendation in his own tanks and publishes the raw data.
Last updated: June 2026