Best CO2 Kits for Beginners
Updated August 2026
Getting CO2 wrong is the fastest way to watch a planted tank fail. You add the best substrate, the right fertilizers, a strong light, and the plants still melt or stall. Nine times out of ten, carbon is the missing variable.
This guide covers every CO2 delivery method, the components that actually matter, how to dial in your bubble rate safely, and when liquid carbon makes sense versus when it does not.
Do You Actually Need CO2 in a Planted Tank?
The honest answer: it depends on your light intensity. CO2 and light are co-dependent. More light means plants photosynthesize faster and consume carbon faster. Without enough dissolved CO2, excess light causes algae, not plant growth.
If you are running a low-tech setup (PAR under 30 at substrate level, slow-growing species like Java fern, Anubias, or mosses), you can skip injected CO2 entirely. Those plants evolved to grow in shaded, CO2-rich rivers and do fine without supplementation.
Once you move into medium or high light, CO2 becomes non-negotiable. The target range in a planted aquarium is 20 to 30 ppm dissolved CO2. Tap water typically holds 3 to 5 ppm at equilibrium. You cannot reach 25 ppm through surface agitation alone; you need injection.
If you are building a planted tank from scratch, read the planted tank setup guide before adding CO2. Getting the substrate, light, and fertilizer baseline right first will make the CO2 phase much cleaner.
Tannin Lab earns a commission on qualifying purchases through the Amazon links on this page, at no extra cost to you. Picks are chosen on performance and suitability, not on commission.
CO2 Methods Compared: The Full Picture
There are four realistic options for a home aquarium. Each has a different cost structure, consistency profile, and maintenance demand.
| Method | Startup Cost | Ongoing Cost | Consistency | Best Tank Size | Effort |
|---|---|---|---|---|---|
| DIY Yeast | $5 to $15 | $2 to $4/month (sugar, yeast) | Low (drops off as yeast exhausts) | Under 20 gallons | High (rebuild every 2 to 4 weeks) |
| Disposable Cartridge | $30 to $80 for regulator/kit | $10 to $20 per cartridge (20 to 45g) | Medium (pressure drops near empty) | Under 30 gallons, short-term | Low to medium (cartridge swaps monthly or more) |
| Pressurized Dual-Stage | $120 to $300 (regulator + cylinder) | $5 to $15 per refill (5 lb cylinder) | High (stable output until near-empty) | 10 to 150+ gallons | Low (refills every 3 to 12 months) |
| Liquid Carbon | $10 to $25 per bottle | $10 to $30/month depending on dose | Consistent but limited | Low-tech, under 20 gallons | Low (daily dosing) |
DIY Yeast CO2: How the Fermentation Reactor Works
A DIY yeast reactor works by fermenting a sugar-water-yeast mixture inside a sealed bottle. The fermentation produces CO2, which you route through airline tubing into a diffuser. The setup costs almost nothing upfront.
The problem is output consistency. Yeast production peaks in the first few days, then tapers off over two to four weeks as the colony starves. Your plants experience a CO2 spike followed by a slow decline, which is not ideal for stable growth.
For a nano tank of 5 to 15 gallons with moderate light, a well-maintained yeast reactor can work. You add some sugar and stir in fresh yeast every few weeks. For anything larger, the inconsistency causes more problems than the low cost saves.
One specific advantage: yeast CO2 does not require a solenoid or a timer. The biology slows on its own when lights are off (yeast activity is not perfectly aligned with your photoperiod, but output does drop naturally overnight at lower room temperatures).
Disposable CO2 Cartridges: Convenient at a Price
Small disposable CO2 cartridges (the kind used in paintball or for carbonating drinks) work with compact regulators sold in aquatic hobby kits. They are the easiest option to start with: no refill logistics, no welding supply shop, no safety certification needed.
The cost per gram of CO2 is significantly higher than a bulk cylinder. A 45-gram cartridge running a 20-gallon planted tank at 1 to 2 bubbles per second lasts roughly three to four weeks. Run that over a year and the operating cost exceeds what a 5 lb cylinder costs to refill annually.
Where disposables make sense: travel tanks, quarantine setups, testing a planted tank before committing to pressurized equipment, or a child’s 10-gallon where simplicity matters most.
Prices move, and stock does too. Each of these opens the product page on Amazon in a new tab.
Pressurized Dual-Stage CO2: The Right Long-Term Choice
A pressurized dual-stage regulator is the standard for serious planted tanks. It takes high-pressure CO2 from a cylinder and steps it down in two stages to a stable working pressure, typically around 30 to 40 psi at the needle valve outlet. Two-stage regulators eliminate the end-of-tank dump that single-stage units are prone to.
The full system has four components you need to understand: the regulator, the diffuser, the drop checker, and the solenoid.
A solenoid valve on the regulator allows you to plug the unit into a timer and have CO2 turn on one hour before lights come on and shut off one hour before lights go out. This is not optional. CO2 running overnight drops pH and stresses or kills fish.
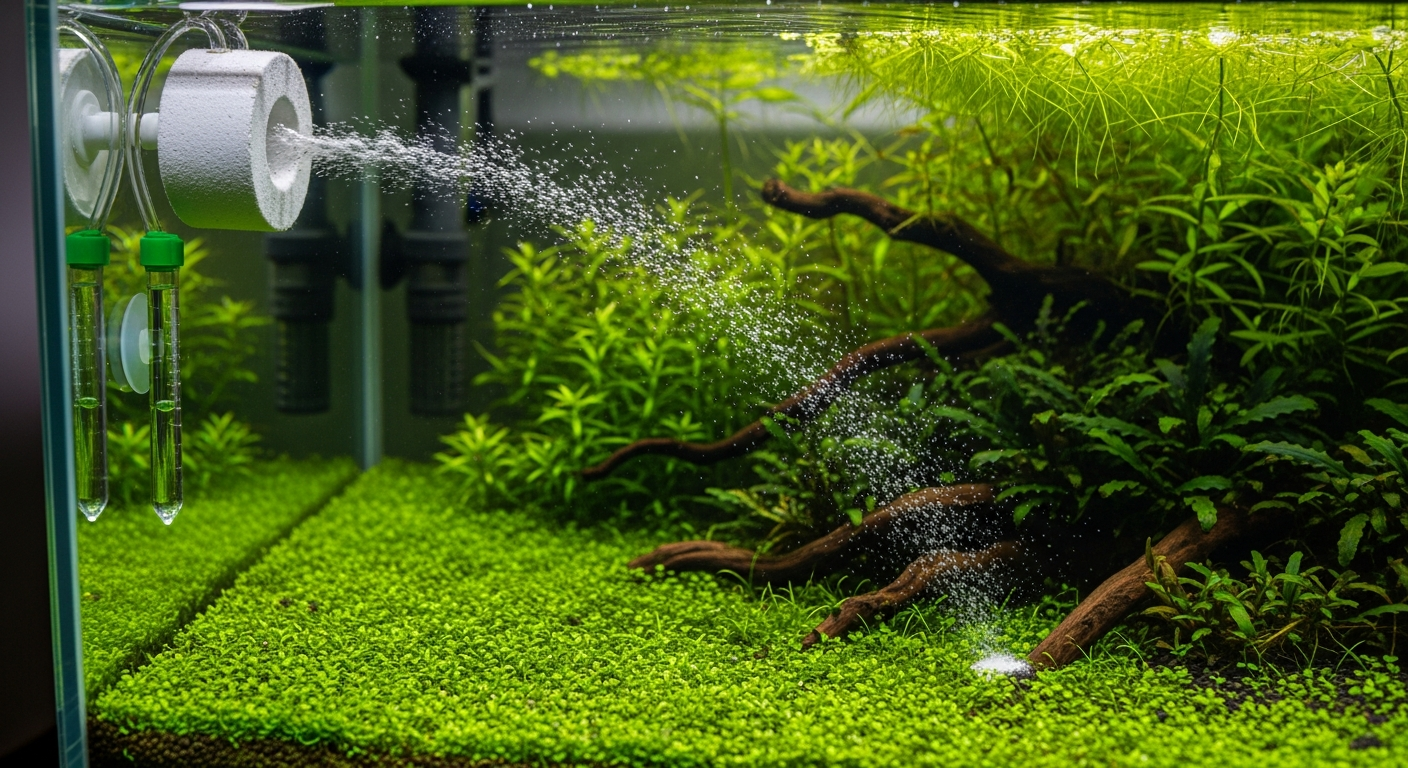
The CO2 diffuser breaks the gas stream into fine bubbles that dissolve in the water column before reaching the surface. Ceramic disc diffusers are the most efficient. The finer the bubbles, the more CO2 dissolves before escaping to air.
For the cylinder itself, you have two paths: a standard 5 lb or 10 lb steel cylinder (exchanged or refilled at welding supply shops or fire extinguisher service centers) or a paintball-size 24 oz cylinder that some hobbyists use on smaller tanks.
The 5 lb option costs roughly $5 to $15 to refill and lasts several months on a 30-gallon tank at normal injection rates.
To get the lighting side right alongside your CO2 investment, see the guide to the best LED lights for planted tanks. Output and spectrum matter as much as CO2 when you are aiming for high-growth results.
The Drop Checker: Your Most Important Safety Tool
Safety Note
CO2 at high concentrations kills fish. A drop checker filled with 4 dKH reference water and bromothymol blue indicator lets you monitor dissolved CO2 continuously without a test kit. Green = ideal (roughly 25 to 30 ppm). Yellow = too high, fish at risk. Blue = too low, not enough for plant growth. Always run your CO2 on a timer so it shuts off at lights-out. If you ever see fish gasping at the surface, increase surface agitation immediately and check your bubble rate. Never dose CO2 in a tank without a drop checker installed.
Bubble counters are not calibrated to each other, so a rate that works on one counter can be wrong on the next. Treat this as the setting you begin from and let the drop checker decide. Yellow means you are gassing the fish. Move the rate once a day at most, because the indicator lags the water by hours.
Dialing In Your Bubble Rate
Start at 1 bubble per second on tanks under 30 gallons. Give it 24 to 48 hours for the drop checker color to stabilize (the liquid lags actual CO2 levels by about an hour).
If the drop checker stays blue after two days, increase to 1.5 bubbles per second. If it turns yellow, drop the rate and increase surface movement slightly to help dissipate excess CO2. The goal is a stable green reading by early afternoon, meaning 3 to 4 hours after CO2 has been running.
A bubble counter (usually built into good diffusers or available as a separate inline unit) makes this measurable instead of guesswork. Count for 15 seconds and multiply by four to get bubbles per minute.
One thing most beginners miss: plants produce visible oxygen bubbles (pearling) when CO2 and light are at the right level. If your plants are pearling midday, your system is working. If they are not, CO2 is likely still insufficient even if the drop checker reads green. Check your light intensity before raising CO2 further.
Liquid Carbon: What It Does and What It Does Not Do
Products like glutaraldehyde-based liquid carbon supplements are sold as an alternative to gas injection. They are not. The carbon available from these products is a fraction of what dissolved CO2 delivers, and the mechanism is different.
Glutaraldehyde acts primarily as an algaecide, which can benefit a tank by suppressing algae growth. Some plants (particularly fast stem plants like Hornwort) will absorb small amounts of carbon from these products. But you cannot reach 20 to 30 ppm dissolved CO2 equivalent through daily liquid dosing on a medium or high-light tank.
Liquid carbon makes sense as a supplementary algae control tool in low-tech tanks, or as a bridge if your CO2 system is down for a few days. Position it correctly and it earns its place. Market it as a CO2 replacement and it will disappoint.
Paired with the right substrate, CO2 is what separates a green tank from a thriving one. The best planted tank substrates provide the nutrient base; CO2 provides the carbon that lets plants actually use those nutrients.
A Practical Buying Sequence for New Setups
If you are starting a new planted tank, buy the CO2 system at the same time as the light. These two inputs need to scale together.
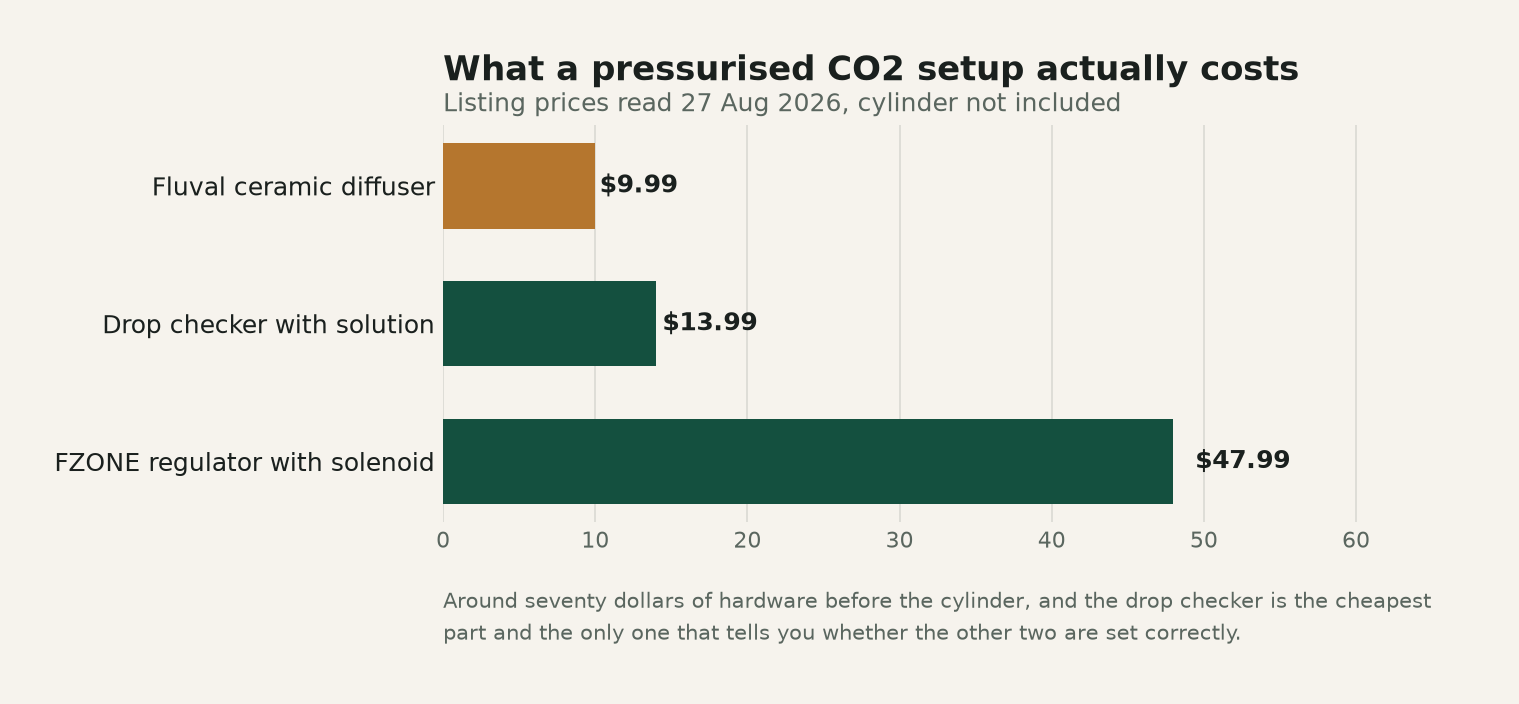
For a 20 to 55-gallon tank, the practical entry sequence is: a dual-stage regulator with solenoid (look for one with a built-in needle valve and bubble counter), a 5 lb aluminum cylinder, a ceramic disc diffuser sized for your tank volume, and a drop checker with 4 dKH reference solution.
Budget around $150 to $220 for the full setup at this size. Cheaper single-stage regulators may work initially, but the end-of-tank dump risk makes them a false economy in a stocked aquarium.
For tanks under 15 gallons where you want to test planted methods before committing to pressurized equipment, a DIY yeast reactor or a paintball-cylinder kit is a reasonable start. Know that you will likely upgrade within 12 months if you enjoy the hobby.
Frequently Asked Questions
- How much CO2 does a planted tank need?
- The target range is 20 to 30 ppm dissolved CO2. Monitor this with a drop checker filled with 4 dKH reference water and bromothymol blue indicator. Green color indicates you are in range. Most tanks reach this with 1 to 3 bubbles per second from a pressurized system, adjusted by tank size and plant mass.
- Can CO2 kill fish in a planted tank?
- Yes. CO2 at excessive concentrations displaces oxygen and drops pH rapidly. Always run CO2 on a timer that shuts off at lights-out, use a drop checker to monitor levels continuously, and maintain enough surface movement to allow gas exchange. If fish are gasping at the surface, increase surface agitation and reduce your bubble rate immediately.
- Is DIY yeast CO2 good enough or should I go pressurized?
- DIY yeast works adequately for nano tanks under 15 gallons with low to medium light. For anything larger or with higher light intensity, inconsistent output from a yeast reactor causes CO2 swings that stress plants and invite algae. A pressurized dual-stage setup becomes cost-competitive with disposable cartridges within about 12 to 18 months and delivers far more stable results.
Marcus Chen
Aquarist & Founder, TanninLab
Marcus has been keeping planted tanks for 14 years. He tests every product recommendation in his own tanks and publishes the raw data.
Last updated: August 2026